iPad Pro Screen Repair
Unlike the early versions of the iPad the newer models have a different design that affects the way you repair the screen. If the screen broke on an earlier model you only had to replace the outer glass/Digitizer and the old LCD got reused. The iPad Air 2 was the first of the new models to have a design that has a fused outer glass/Digitizer with the LCD as one component. This new component is much more expensive than just the outer glass. That is no different in the new iPad Pros.
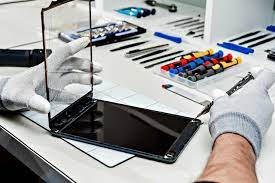
This iPad Pro 12.9" model was dropped and bounced down the stairs shattering the screen and making the device unusable. To repair this model you can buy a new screen and LCD combo to replace the broken one but you need to be aware of one little issue. If you do not have microsoldering skills you need to be sure to order a new screen that already has the Display Daughter Board soldered onto the back. Otherwise you will need to order that component separately and solder it into place so you will be able to connect the screen to the device.
Now the next thing you need to do is remove the long EMI shield covering the logic board and then take out the single screw holding the battery connection. Slide something between the logic board and the battery connector underneath like I did with this red plastic razor blade. This disconnects the battery and makes it safe to disconnect the screen without blowing a backlight fuse.
Now you will see the three screws holding the screen to the logic board. Remove those screws and keep them organized for replacement. Once the screen is free you need to carefully remove the Touch ID enabled home button.
Be super careful when removing this home button because it is paired with this device and is the only home button that will have the Touch ID functionality. If you tear its super thin flex cable you have ruined that functionality and the only way to get it back is to go to Apple. They will take yours and give you one that was already refurbished and they will refurbish yours for the next guy. You can find videos on carefully removing this in our YouTube Channel. Be sure to super glue the home button bracket to the back of the glass because if you dont normal use can push the home button into the device and you will have another repair on your hands.
The next thing you need to do is clean up all the old adhesive from the aluminum housing and look for bends in the edge that would prevent a new screen from sitting flat. I use Goo Gone and a paper towel to clean up the adhesive. Once wet I scrape it with a metal scrap tool until it is all gone. Make sure it is completely dry before putting down more double sided sticky tape.
There is no substitute for Tesla Tape and if you use a cheap tape you will have the screen come up later. Tesla tape will hold it down until you apply heat to lift it up the next time you break it.